
Growing plants from seed offers access to a wide range of vegetables, flowers, herbs, and ornamentals. It can be economical when raising many plants and allows gardeners to choose varieties that may not be available as transplants. Seed starting also provides a close view of the plant’s early development. However, successful germination depends on seed quality, temperature, moisture, oxygen, light requirements, and sowing depth. A planned setup is more reliable than placing seeds in any available soil and watering occasionally.
Table of Contents
- Choose suitable seed
- Understand germination requirements
- Prepare containers and growing medium
- Sow at the correct depth
- Water without displacing seeds
- Temperature and humidity
- Light after emergence
- Thin and care for young seedlings
- Potting on and hardening off
- Common seed-starting problems
- A seed-starting record
- Diagnose seed-starting problems by stage
- Decide when seedlings are ready to transplant
- Frequently Asked Questions
Choose suitable seed
Select seed suited to the local climate, growing season, available space, and intended use. Check the packet for the expected germination conditions, sowing depth, spacing, and time to maturity. Fresh seed from a reputable supplier generally offers more predictable results, although some species remain viable for years when stored correctly. Old or poorly stored seed may germinate unevenly. If viability is uncertain, test a small sample before using an entire packet.
Understand germination requirements
Seeds need moisture to begin growth, but they also need oxygen. Many common seeds germinate best in a warm, evenly moist medium, while some cool-season species prefer lower temperatures. Certain seeds need light to germinate and should not be covered, while others require darkness or a specific depth. Some species have dormancy requirements such as cold stratification or scarification. Follow the needs of the plant rather than applying one method to every seed.
Prepare containers and growing medium
Use clean trays, pots, or cell packs with drainage holes. A purpose-made seed-starting mix is usually lighter and more uniform than garden soil, which may compact in containers and contain weed seeds or pathogens. Moisten the mix before filling containers so it is evenly damp but not saturated. Fill cells without compressing the medium heavily. Clean reusable equipment before sowing, especially if it has previously held diseased seedlings.
Sow at the correct depth
Plant seeds at the depth recommended for the species. A common guideline is to cover a seed with a layer of mix related to its size, but some small seeds need light and should remain on the surface. Large seeds may need deeper placement. Sow one or more seeds per cell according to germination reliability and the instructions, then thin later if necessary. Label each container with the variety and sowing date to avoid confusion.
Water without displacing seeds
Use a gentle watering method that moistens the medium without washing seeds into corners or burying them too deeply. A fine spray, careful bottom watering, or a small watering can with a rose may be suitable. Keep the medium evenly moist during germination, but remove excess water from trays. A saturated mix can deprive seeds of oxygen and encourage decay. Check moisture regularly because small containers can dry faster than garden beds.
Temperature and humidity
Many seeds germinate within a moderate temperature range, but the ideal conditions differ by species. A heat mat can help with warmth-loving seeds when used with a thermostat and appropriate safety precautions. Remove or reduce bottom heat when it is no longer needed. A humidity dome can slow drying before emergence, but it should be ventilated and removed as seedlings appear. Persistent condensation and stagnant air increase the risk of disease.
Light after emergence
Once seedlings emerge, provide the light they need to grow compact and sturdy. A bright window may be sufficient for some species, but light levels can vary greatly by season and orientation. If using grow lights, position them according to the manufacturer’s recommendations and adjust as plants grow. Insufficient light causes seedlings to stretch toward the source and develop weak stems. Rotate trays if light comes mainly from one direction.
Thin and care for young seedlings
When seedlings develop their first true leaves, thin crowded cells to leave the strongest plant where appropriate. Cut unwanted seedlings at the medium surface if pulling them could disturb neighboring roots. Maintain gentle airflow and water according to the needs of the crop. Avoid strong fertilizer before seedlings can use it; some seed-starting mixes contain little nutrition, so feeding may eventually be needed at a suitable dilution and stage.
Potting on and hardening off
Move seedlings into larger containers when roots fill the cell or growth requires more space. Handle them by leaves rather than squeezing delicate stems. Before planting outdoors, harden them off gradually by increasing exposure to outdoor light, wind, and temperature over several days. Avoid sudden transfer from a sheltered indoor environment to full sun. The correct schedule depends on the species and local weather.
Common seed-starting problems
Poor germination may result from old seed, incorrect temperature, excessive depth, dry mix, waterlogging, or dormancy requirements. Leggy seedlings usually need more light or less crowding. Collapsing stems can indicate damping-off, while pale leaves may reflect nutrition, light, roots, or watering problems. Diagnose the growing conditions before applying fertilizer or pesticides. Remove diseased seedlings and improve sanitation, drainage, and airflow.
A seed-starting record
Record the variety, source, sowing date, depth, temperature, germination date, and transplant date. These notes help determine which varieties perform well and whether the timing should change next season. Start with a manageable number of varieties and expand as the routine becomes reliable. Clean equipment between sowings and store unused seed in a cool, dry place suited to its requirements. Careful preparation turns seed starting into a repeatable and rewarding part of gardening.
Keep a simple propagation log with the plant name, parent plant, date, preparation method, medium, and observations. A record helps distinguish a method that consistently works from one that succeeds only occasionally. It also prevents repeating avoidable mistakes, such as using the wrong part of a stem or keeping the medium too wet. Photographing progress at regular intervals can be useful when changes are slow.
Cleanliness is important throughout propagation. Wash containers before reuse, use fresh or properly prepared growing medium, and clean cutting tools between parent plants. Remove decaying material promptly and do not allow diseased leaves or stems to remain beside healthy propagations. These habits reduce the chance that a small problem will spread through an entire tray or batch.
Do not judge success only by the appearance of the top growth. New leaves can sometimes develop using stored energy before a cutting has formed enough roots. Conversely, a healthy root system may be developing before obvious top growth appears. Follow the expected timing for the species and avoid repeatedly pulling, unwrapping, or moving propagations to check progress.
Match moisture to the plant and method. A medium that is suitable for a soft tropical cutting may be too wet for a succulent or dormant woody stem. Drainage, container size, temperature, airflow, and humidity all influence how quickly water is lost. Check the actual condition of the medium and adjust rather than following a fixed watering schedule.
Be patient and plan for some losses. Even careful propagation does not guarantee that every cutting, leaf, seed, or division will establish. Taking a modest number of extra propagations can account for normal variation, but do not remove so much material that the parent plant is weakened. Choose healthy material, use a suitable method, and give new plants time to become established.
Seed starting stages at a glance
| Stage | What to do | What to monitor |
|---|---|---|
| Seed selection | Choose fresh, suitable seed for the growing season | Species, variety, age, and viability |
| Sowing | Use a clean medium and the recommended sowing depth | Seed size and light requirements |
| Germination | Maintain suitable moisture and temperature | Drying, waterlogging, and emergence time |
| Seedling growth | Provide adequate light and airflow | Stretching, damping-off, and crowding |
| Thinning and potting | Give seedlings room and handle roots gently | True leaves and root development |
| Hardening off | Gradually expose seedlings to outdoor conditions | Sun, wind, and temperature stress |
| Transplanting | Plant at suitable spacing and water in | Wilting and establishment |
For additional guidance, consult Penn State Extension guidance on starting seeds indoors.
Explore these related propagation guides:
Explore more related propagation methods:
Diagnose seed-starting problems by stage
When seeds fail, check the stage at which the process stopped. Seeds that never swell may be too dry, old, impermeable, or exposed to unsuitable conditions. Seeds that swell but decay may have been kept too wet or sown in contaminated medium. Seedlings that emerge and collapse near the soil line may be affected by damping-off, often associated with overly wet conditions and poor airflow. Leggy seedlings usually point to insufficient light after emergence rather than a seed-depth problem.
| Symptom | Likely factors to investigate | First adjustment |
|---|---|---|
| No emergence | Seed viability, temperature, depth, light requirement | Check the species germination instructions and test a small sample |
| Seeds rot before emergence | Saturated medium, poor drainage, contaminated containers | Improve drainage and sanitation; avoid constant saturation |
| Seedlings collapse at soil level | Damping-off risk, crowding, excess moisture | Improve airflow and remove affected seedlings |
| Long, weak stems | Insufficient light or overcrowding | Increase suitable light and space seedlings |
| Growth stalls after emergence | Root restriction, temperature, moisture, nutrition | Check roots and growing conditions before feeding |
Decide when seedlings are ready to transplant
Do not use height alone as the transplant trigger. Look for true leaves, a root system that holds the plug together without being tightly root-bound, and enough stem strength to handle carefully. Some crops are transplanted young; others are best sown directly because their roots dislike disturbance. Harden off seedlings raised indoors or under protection by gradually exposing them to outdoor light, wind, and temperature changes over several days, adjusting the pace to local conditions.
University extension guidance emphasizes that germination temperature, sowing depth, light, and transplant timing vary by crop. Use the seed packet or a trusted crop-specific reference for exact requirements, and record sowing date, emergence date, and any treatment so repeated batches can be compared.
Related Gardening Guides
Explore these related guides for more practical ideas and planning advice:
- How to Save and Store Seeds from Your Garden for Future Planting
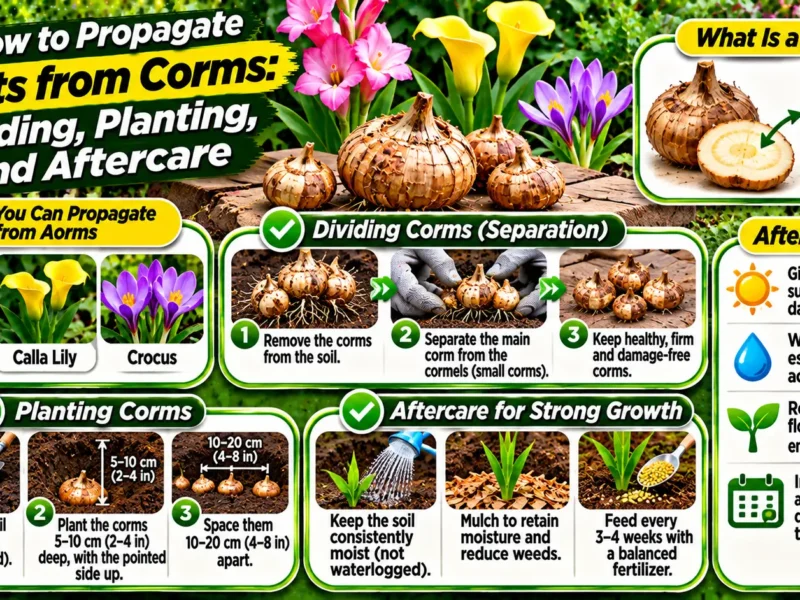
- How to Propagate Plants from Corms: Dividing, Planting, and Aftercare
- How to Propagate Houseplants in Water: A Step-by-Step Guide
Frequently Asked Questions
How deep should I plant seeds?
Follow the instructions for the species. A common guideline is to sow seeds at a depth related to their size, but some need light to germinate and should be surface-sown.
Should seed-starting mix stay wet all the time?
Keep it evenly moist but not waterlogged. Excess water reduces oxygen around seeds and can encourage rot or damping-off, while allowing the medium to dry completely may interrupt germination.
When should seedlings be moved outdoors?
Harden seedlings off gradually before planting outside. Increase their exposure to outdoor light, wind, and temperature over several days, adjusting the process to the crop and local weather.
How do I know when a seedling is ready to transplant?
Look for a sturdy stem, healthy true leaves, and a root system that can hold the growing medium together. Check the crop’s recommended stage and avoid transplanting during stressful weather when possible.
3 thoughts on “How to Grow Plants from Seeds: A Reliable Guide from Sowing to Transplanting”